Editorial & Photography By: Dr. Christopher Cooper
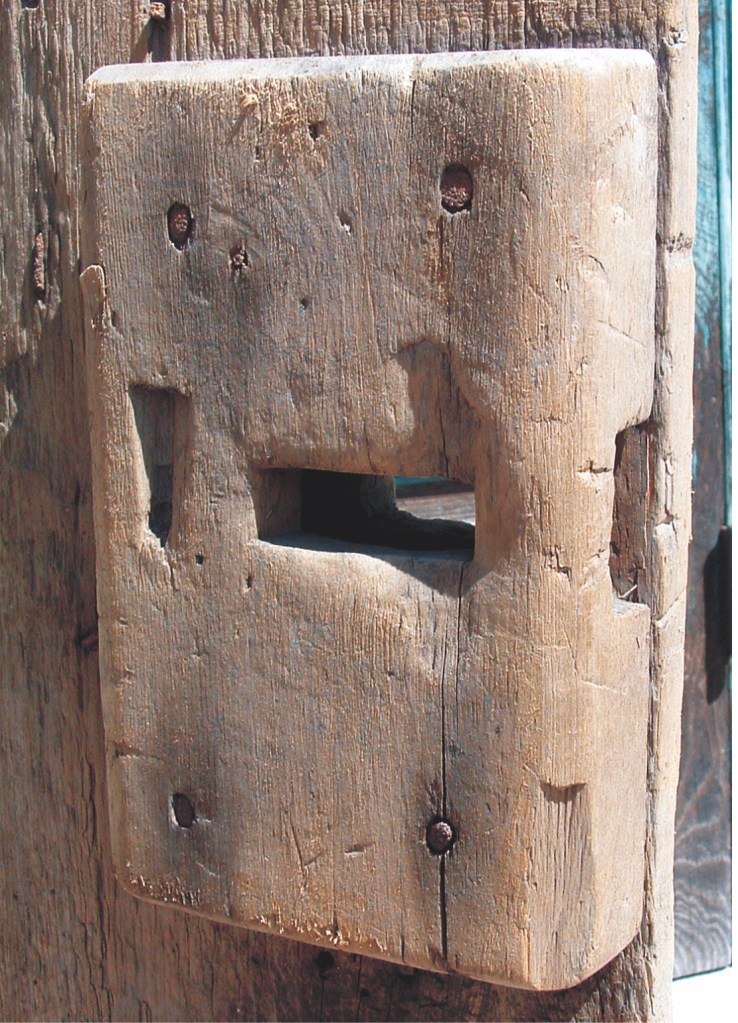
Image 1
You will find all sorts of interesting things when you dismantle an old building. Last spring we brought down a little timber-framed tool barn at Blenheim Farms and found an old rotted ledged door up in the rafters that I thought might be fodder for the burn pile.

Image 2
After casting it to the side, I came back to it at the end of the day and turned it over and found a lovely surprise: a very well preserved, although not complete, wooden box latch, replete with rawhide pull handles (see image 1). The age of the find looks to date from the last quarter of the eighteenth century; nailed in place on the door with stout hand-made rose-head nails c. 1700’s. The rawhide pull handle has been repaired repeatedly on the lower attachment to the door with every imaginable type of nail from square to rectangular and finally wire nails which replaced the original rose-head nails visible below (see image 2).
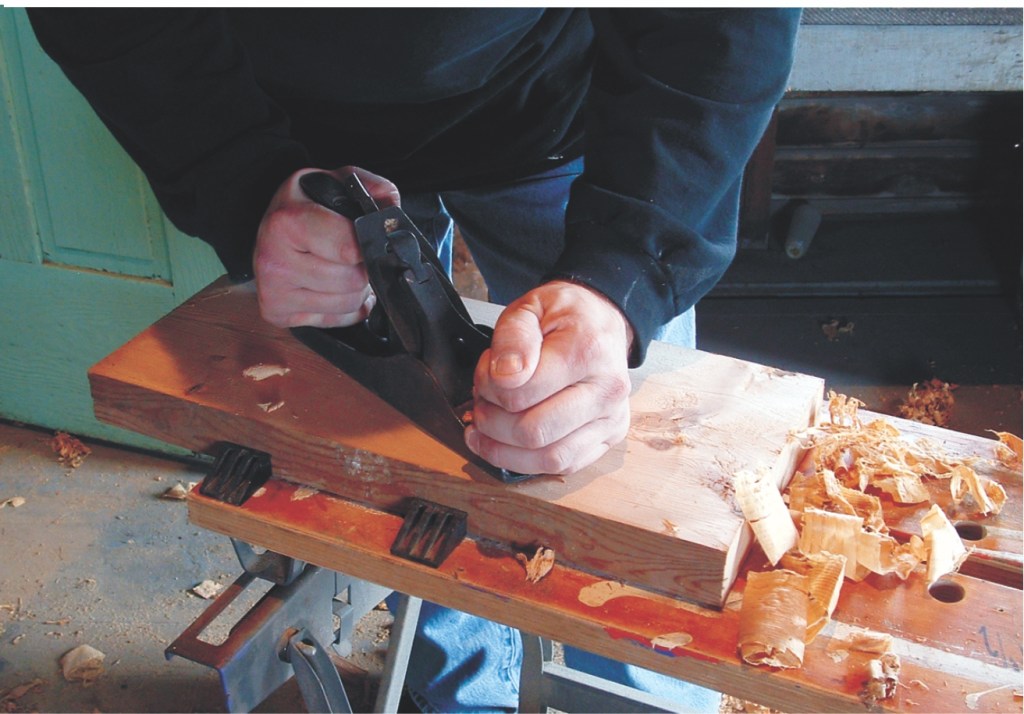
Image 3
Stella Lillico, who was born on the farm in 1912, recounts that the original timber framed homestead was located at the foot of the driveway and the foundations as well as some of the building were still there when she was a small girl. Many old buildings in the eighteenth and nineteenth centuries were recycled into new buildings. Because the loft area of the old tool barn was made of five c. 1787 (through dendrochronology) log floor joists, one can imagine that the old homestead, in part, found a home in this structure built around 1920 from a recycled barn c. 1870’s from Waterloo County just north of the farm. Possibly the old door which had been in service on the old homestead for a century or so was kept as a fond remembrance of the place long after its demise and forgotten about until we happened along.
The simplicity of the latch clearly illustrates early Canadian rural ingenuity; sadly, the slide and the keeper have long since been lost through time or rot. After close examination of the latch, I was able to determine what the latch in whole would have looked like when it was first built. The latch could be used as either a shed latch or a new latch for interior doors in a rural Georgian home.
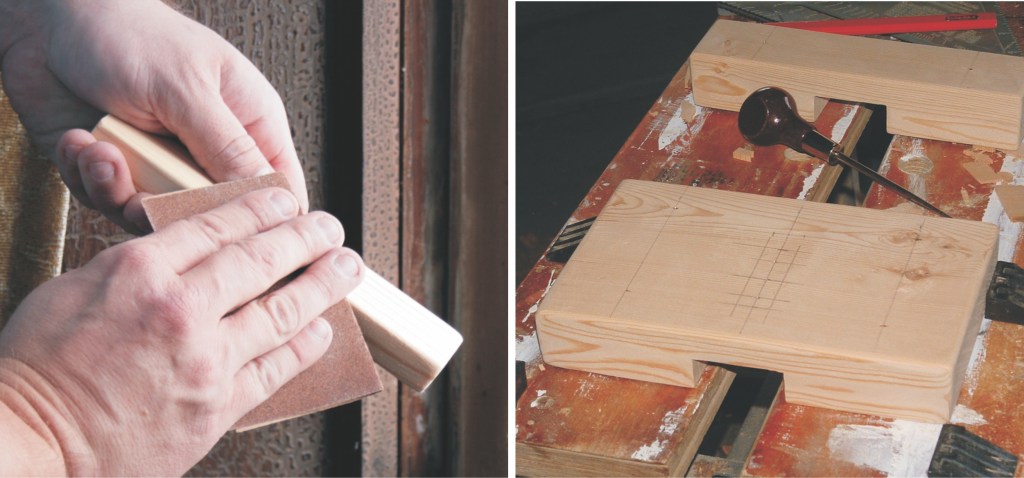
I found some great old Eastern white pine floor joists from the same dismantled tool shed. The wood was old and the patina told the tale of age. I cut a piece to the approximate size of the newly-interpreted box latch and hand planed the two sides to the thickness of the original (see image 3). I then took the stock over to the table saw and trimmed the width to the proper size.
Left Image 4 | Right Image 5
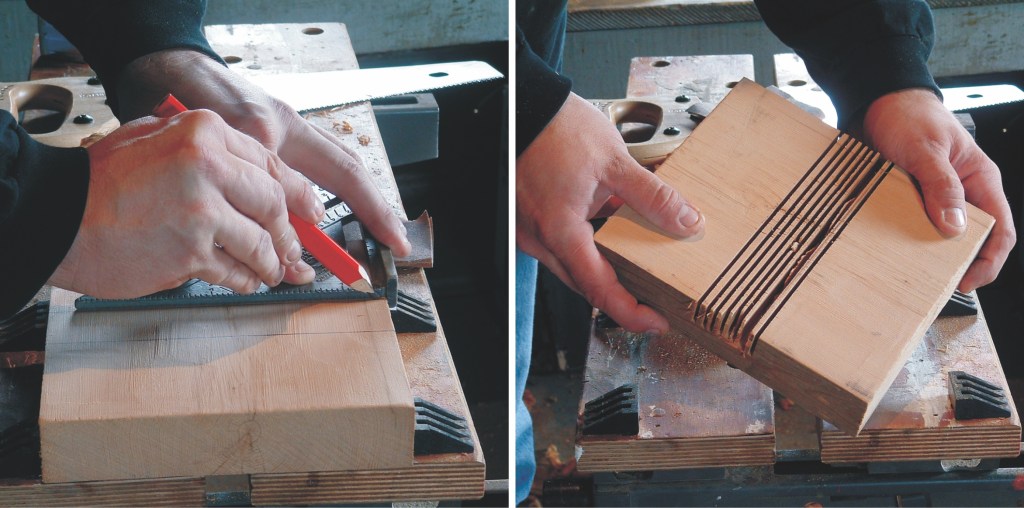
On the underside of the now lovely piece of timber, I marked a slot that would follow down the grain of the piece that would make up the area for the slide to ride in (see image 4). I very carefully lowered the blade in my table saw to the depth required and set my fence to the marked edges of the slot. I ran the piece through and moved the fence further away from the blade for a few passes just to nibble out most of the wood within the slot (see image 5).
Left Image 6 | Right Image 7
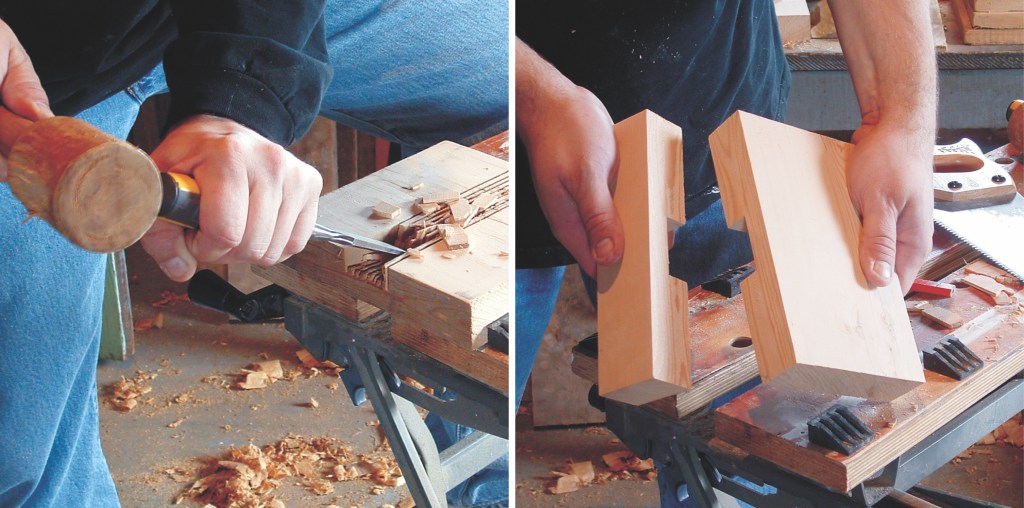
I clamped the piece onto my workbench and proceeded to knock out the excess wood with a chisel in the slot, cleaning up the balance with a very sharp chisel removing any burrs that might impede the slide (see image 6). The now-slotted piece of wood will make up both the box latch and the keeper. Laying out the keeper, I simply cut it off with a sharp saw (see image 7). I then got to work on the slide.
Left Image 8 | Right Image 9
I fashioned the slide out of a good hard piece of very old pine, cutting it slightly smaller in dimension to the height and depth of the slot in the box and keeper. I rounded over all the edges a little with sandpaper to allow the slide free movement without bind (see image 8). With a sharp saw I then cut the slide to length and rounded the ends as well with sandpaper.
Left Image 10 | Right Image 11
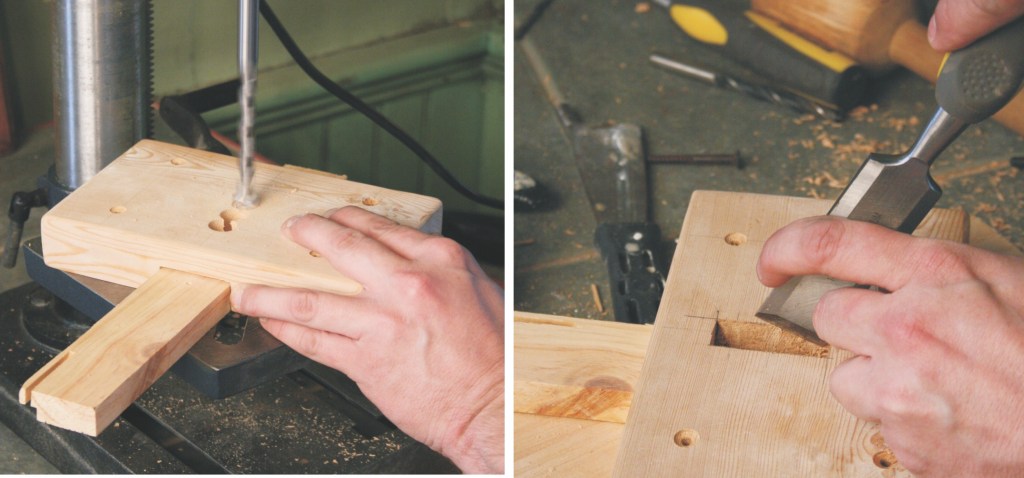
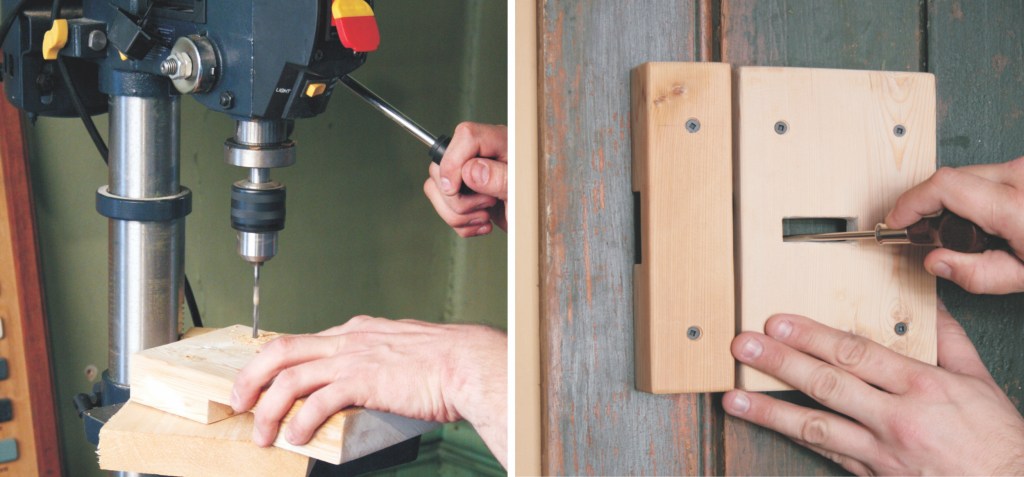
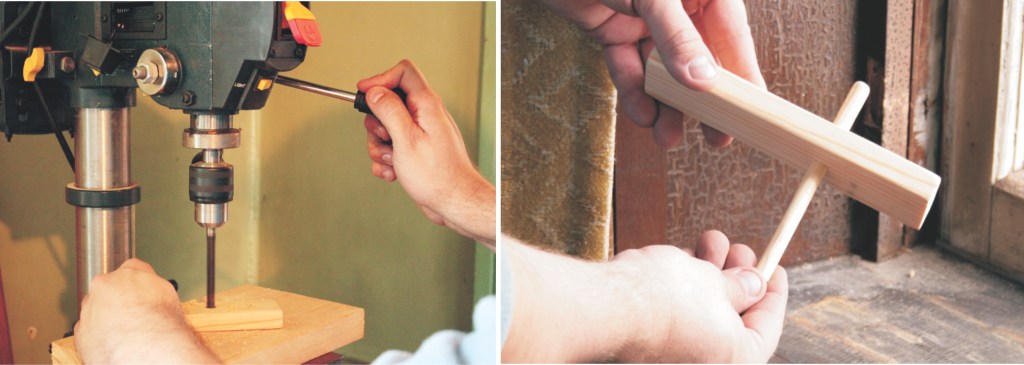
The placement of the slide’s draw pin was taken from the original box latch and laid out on the face of the new box (see images 9). On the drill press, I ran several ½” diameter holes on the layout lines; by placing a scrap of wood in the slot, you can ensure not to have tear-out on the back side (see image 10). With a very sharp chisel, I proceeded to pare the round holes into a square mortise (see image 11). The same will have to be performed on the door once the box is ready to be attached with a hand drill; however, it is better to use the new box as a template to locate the door mortise.
Left Image 12 | Right Image 13
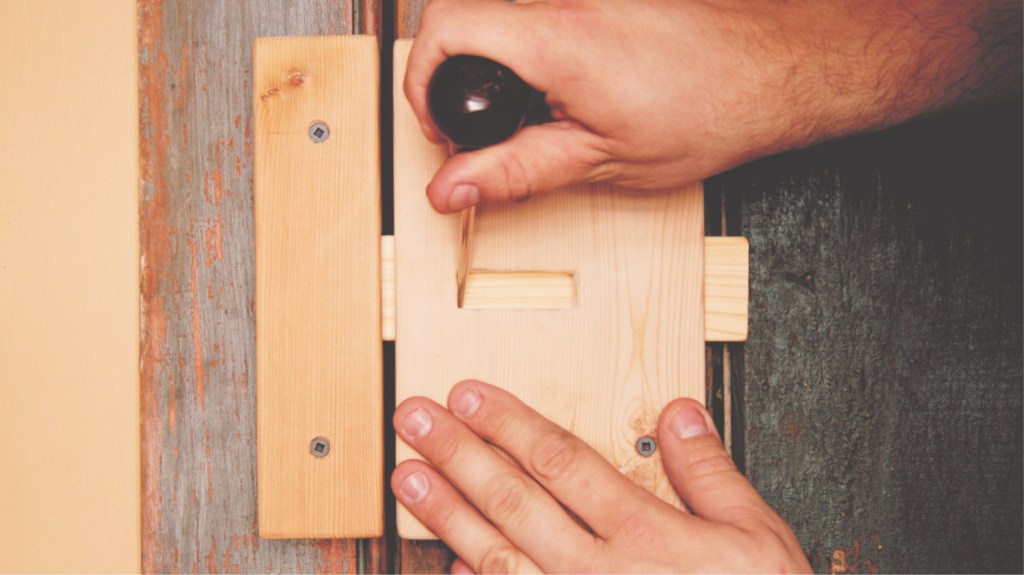
Image 14
I have decided to attach this latch with slotted screws rather than nails to facilitate future maintenance on the box latch if a slide were to break, etc. I carefully laid out the centre points of the screws in the box and the keeper and ran some pilot holes through them with the drill press fitted with a countersink bit (see image 12). I attached the box to the door and the keeper to the architrave (with temporary screws) and marked the mortise on the door with a thin scratch awl (see image 13). I fed the slide into the slot and aligned it in the keeper. Then, with the same scratch awl, I marked the end of the box mortise on the slide that is in the far left or locked position (see image 14). I then removed the box from the door.
Left Image 15 | Right Image 16

Image 17
The slide is now marked (as above) at the farthest point to which it is fully engaged in the keeper or in the locked position. By measuring back half the thickness of the draw pin, I will have the exact position to drill a hole through the slide to house the draw pin (see image 15). The draw pin is a hand-shaped piece of pine (larger than the drilled hole) in which I have simply drove home with a wooden mallet through the slide allowing plenty of room on the inner door side when it is mounted to allow a good grasp (see image 16).

Image 18
I painted all the disassembled components with a coat or two of milk paint and then applied several coats of hemp oil as a durable finish (see image 17). The inner slot and slide were treated with a couple coats of Beeswax to facilitate a smooth movement. I remounted the box latch and keeper hopefully pressing it into service for a couple of hundred years (see image 18). One day the same soft wear marks will be visible with good use and age.
Side bar:
LOCK-IT!
For a locking version of this wooden box latch, a small hole can be drilled from the interior door side through the door and into the slide – in its locked position – at the rear of the box. By attaching a corresponding wooden pin on a string or chain to the door, one can simply slip the pin into the latched slide locking the door from the inside. Rural ingenuity! Can’t beat it!
