Editorial & Photography By: Dr. Christopher Cooper
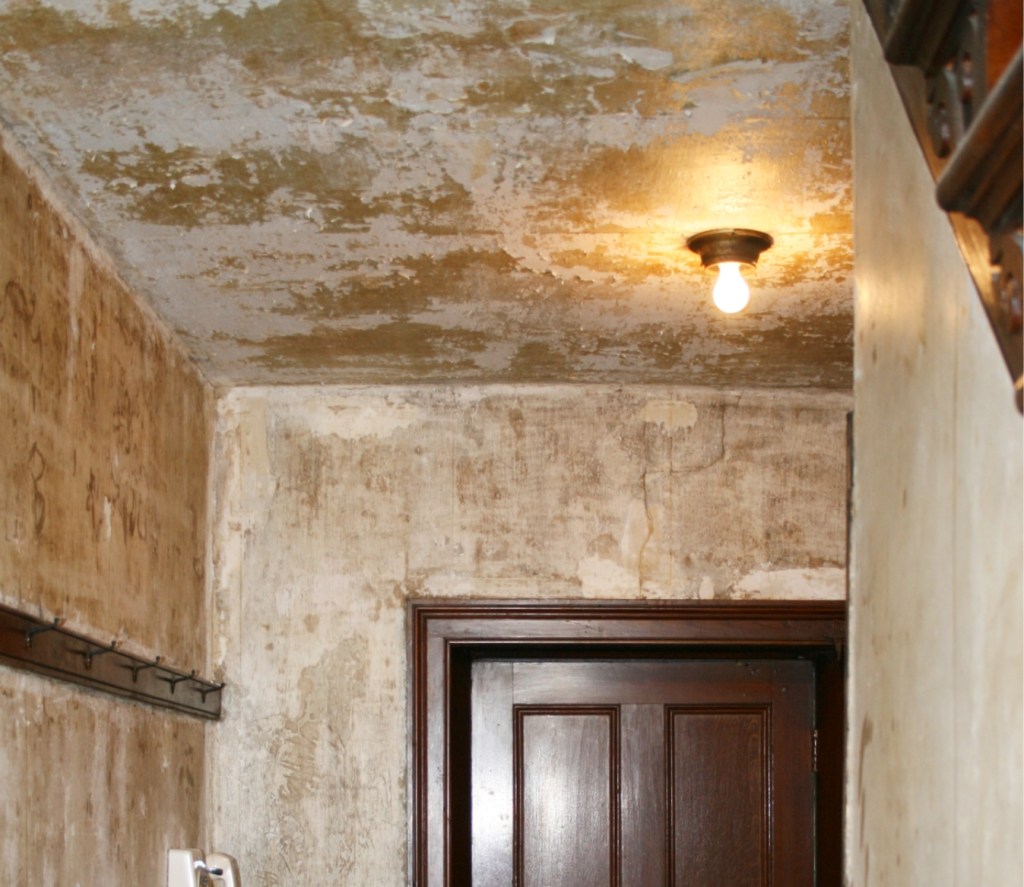
Image 1
Many people who live in century houses come across, in some cases, dozens of layers of wallpaper on walls and ceilings. Originally lath and plaster walls were created as nothing more than a blank canvas to place hand-printed wallpapers over. This practice stayed in favour until more recent years.
As a purist, I prefer to replace the wallpaper once the old is removed. However, the time and expertise involved may not be for the average homeowner (have you found a straight 90 degree corner in your old house?). Furthermore, the ability to simply paint a wall by choosing from the endless palettes of colour available seems more logical when compared to the cost of heritage wallpaper patterns that range into the hundreds of dollars for a single roll.

Image 2
Removal of wallpaper is not an easy task. Unsympathetic approaches when dealing with old wallpaper include painting the paper to just papering over the old. Either approach leaves a rather tiresome task set for the do-it-yourself restorationist!
In most cases, one labours over removing many layers of wallpaper only to find that the wall is a wreck below the paper resulting in the removal of the character-defining plaster walls in favour of drywall. Very rarely have I found a pristine wall or ceiling surface underneath wallpaper unless it is a high quality plaster with a very smooth even surface that has never seen the paintbrush.
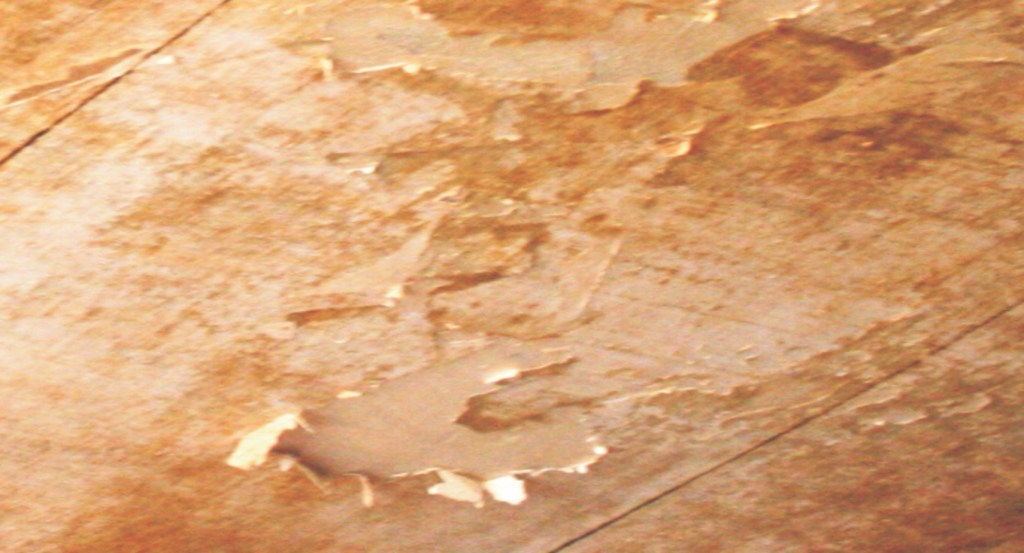
At the Blenheim Farms House, eight rooms and both halls are papered. From the day the house was built, these papered walls have never been painted. On the second level where very old wallpaper resides, the removal process has been a breeze and the plaster below the paper needs only a modicum of repair. The main living level is an entirely different story; the walls have been decorated and redecorated continuously over the past 170 years. It seems the previous layers of paper have never been completely removed. The ceilings in the living level are, in the most miserable condition due in part to the calcimine (see side bar for more information) used as ceiling whitening (see image 1).
The Removal Process:
Vinyl Coated Paper

Image 3
The process of removing old wallpaper is rather easy when it is on smooth even plaster. The paper in image 2 is a dry strippable vinyl coated paper that was hung in the front hall in July of 1987. With the aid of a razor blade in a holder, the edge of the vinyl portion of the dry strippable paper is lifted and removed in strips (see image 3).

Image 4
You can attempt to do this with wallpaper that has been painted as well. In a litre and a half water bottle, a quarter cup of fabric softener is mixed with the hottest tap water available (see image 4). An area approximately four feet by four feet is sprayed liberally with the fabric softener and hot water mixture (see image 5). After about ten minutes, use a flat flexible putty knife and the backing should easily come away in large swaths (see image 6).

Image 5
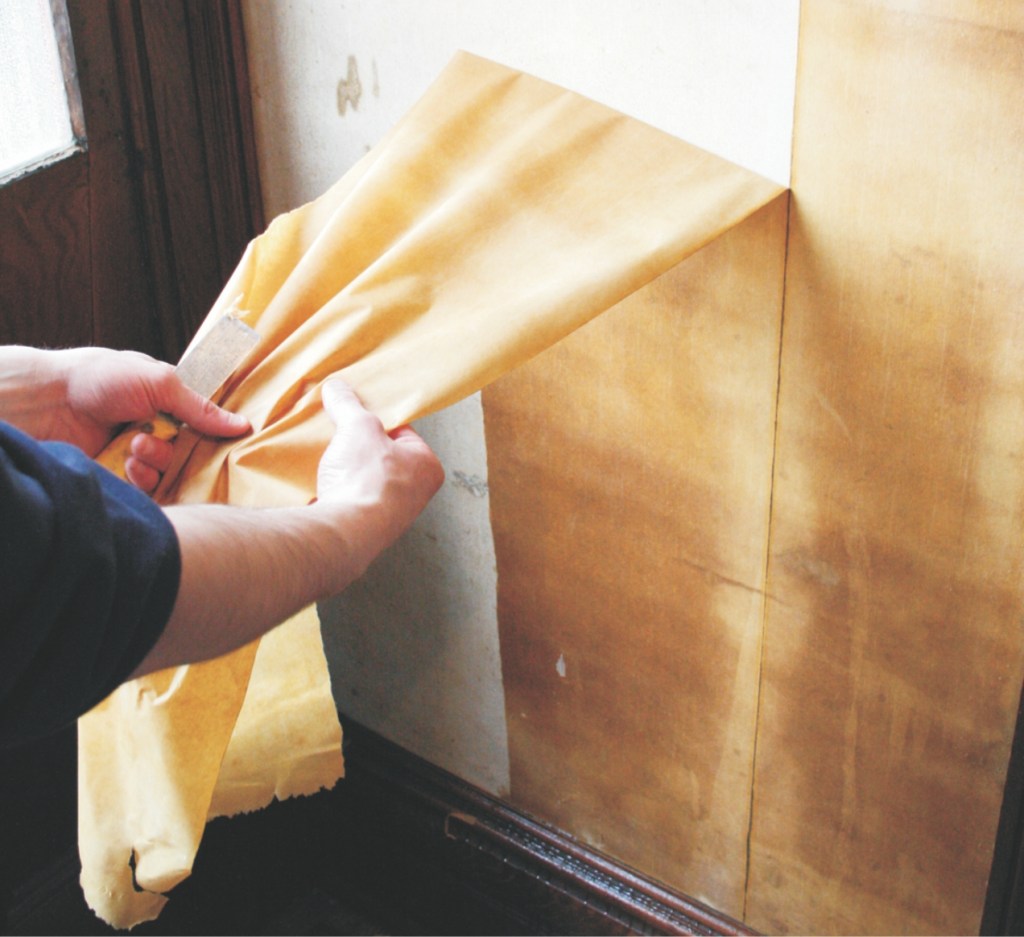
Image 6
Older uncoated paper should be first scuffed with a pole sander with 100 – 150 grit paper until the surface becomes clouded (see image 7). Do not be tempted to use a quickie device with serrated blades that nick the paper because you may end up repairing thousands of little nicks in your plaster, too! The process of using the fabric softener and hot water is used as directed above. In some cases, several applications of the water fabric softener solution may be needed, so don’t get discouraged.

Image 7
Some of our readers are questioning whether a steamer should be rented? The answer to this question is an absolute no! A wallpaper steamer can be the demise of lime plaster that has a poor original mix of too much sand in relation to lime; these devices are awkward and scalds are frequent. Furthermore, a steamer introduces copious amounts of water pushed into the wall system that is never healthy to the historic fabric of the building; spraying water on a wall surface is less damaging.

Image 8

Image 9

Image 10
Well, it’s all done and the wall looks like something out of an abandoned factory (see image 8). Most often when wallpaper is removed, old glues and stains make all your hard work seem in vain. Don’t fret – drywall is not the answer. A little trick in the restoration trade is to prime the wall with an old-fashioned tinted whitewash (see recipe in sidebar). You see, when you pre-prime with a lime-based wash, it will fill in small nicks and scrapes and the dark tint will allow you to see areas that may need small surface repair (see image 9). Once the wall is primed, a lime-based repairing compound (see side bar for recipe) can be used to fill voids and even out bad spots (see image 10). Lime plaster is a lovely material with no sanding required – just a simple blending into its surroundings with a damp paintbrush once it begins to set-up (see image 11).
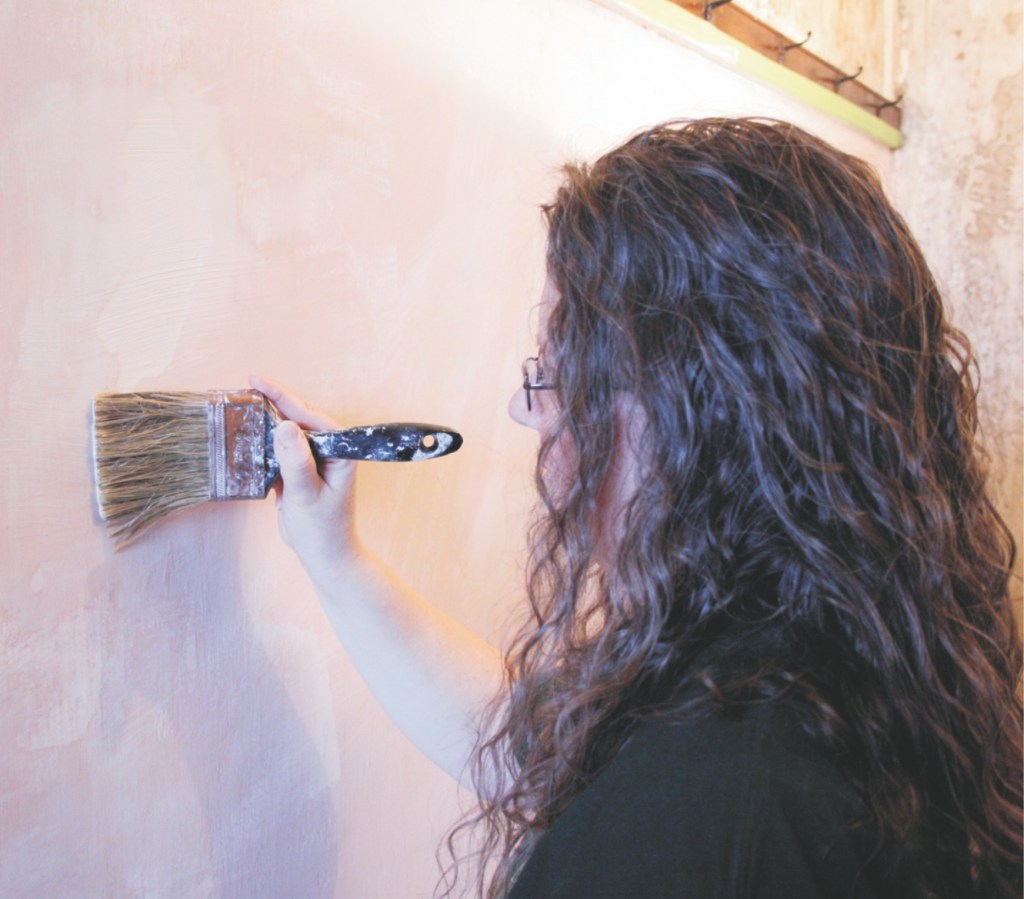
Image 11
Image 12
After the lime has had time to cure properly, the whole wall can be painted (see image 12). It’s finished – a job well done! Now, settle down in that old chair, and watch how the setting sun’s light and shadows fall on a beautiful hand-wrought plaster wall and smack yourself for even thinking of drywall!
Side bar:
Calcimine
Calcimine is a mixture of lime or chalk, glue size, and water that is placed on ceilings to give a dead-flat whitening. Once calcimine ages, it will lose its binder (glue size) and it begins to crack and curl giving a very unsightly appearance.
Recipes
A simple whitewash consists of natural hydraulic lime (NHL) and water. Mix well until you achieve the consistency of thick paint. To tint the lime wash add a commercial paint tinting dye, or an inexpensive acrylic art paint. The whitewash will keep for a couple of days in a well sealed container, mix well before reusing.
The repair compound used in the repair of the wall is: Two parts autoclaved lime (NHL) and one part Plaster of Paris, add water until a consistency of commercial drywall mud is achieved.

Good article. Having restored an 1855 frame/stucco house, and currently an 1856 stone house, we have dealt with layers of wallpaper. I had used some of these techniques, but the advice on using a lime based substance on the walls after wallpaper removal is something I wish I have known of earlier. We have one more room to do in this house, and I will certainly follow this advice.