Editorial & Photography By: Dr. Christopher Cooper
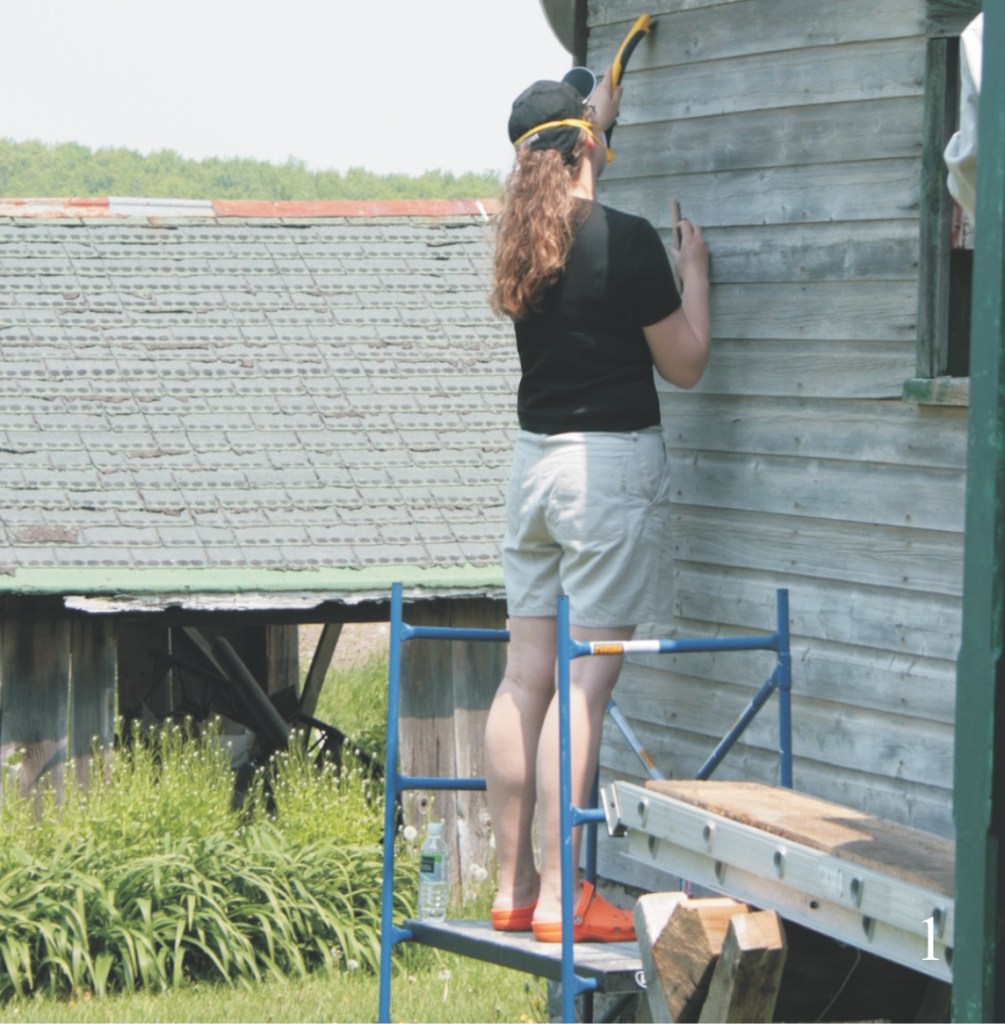
Image 1
When I was young and foolish, I would climb ladders and walk ridgepoles on three-and four-storey houses without a care and without fear. Since I have reached the 40- something era in my life, I find my knees knocking together on a six-foot stepladder. In the early 1990’s, I had an incident in Sydney, Australia while working on a large-scale restoration where a huge, high metal scaffold collapsed under me while I was inspecting some column capitals my apprentices and I had restored. I was left dangling from my safety harness (I have always opted to be attached to the building and not the scaffolding– smart in retrospect) with the line wrapped around my neck and under my armpit with me holding on for dear life so as not to hang myself. During my 45-minute wait for the fire brigade, I had the chance to contemplate my existence, while rotating on my safety line; a slow 360-degree view of downtown Sydney was my sole companion.
From that day forward, I have never trusted metal scaffolding again. The following week I erected wooden scaffolding that towered some 75 feet from the pavement below. During the restoration of our Old Home Living House One project in Brantford, the decision was made to erect scaffolding in order, to use an infrared paint stripper to remove the paint wholesale from the ends of the side gables, with old knock-knees here caulking, priming, painting and installing new rake frieze and trim.
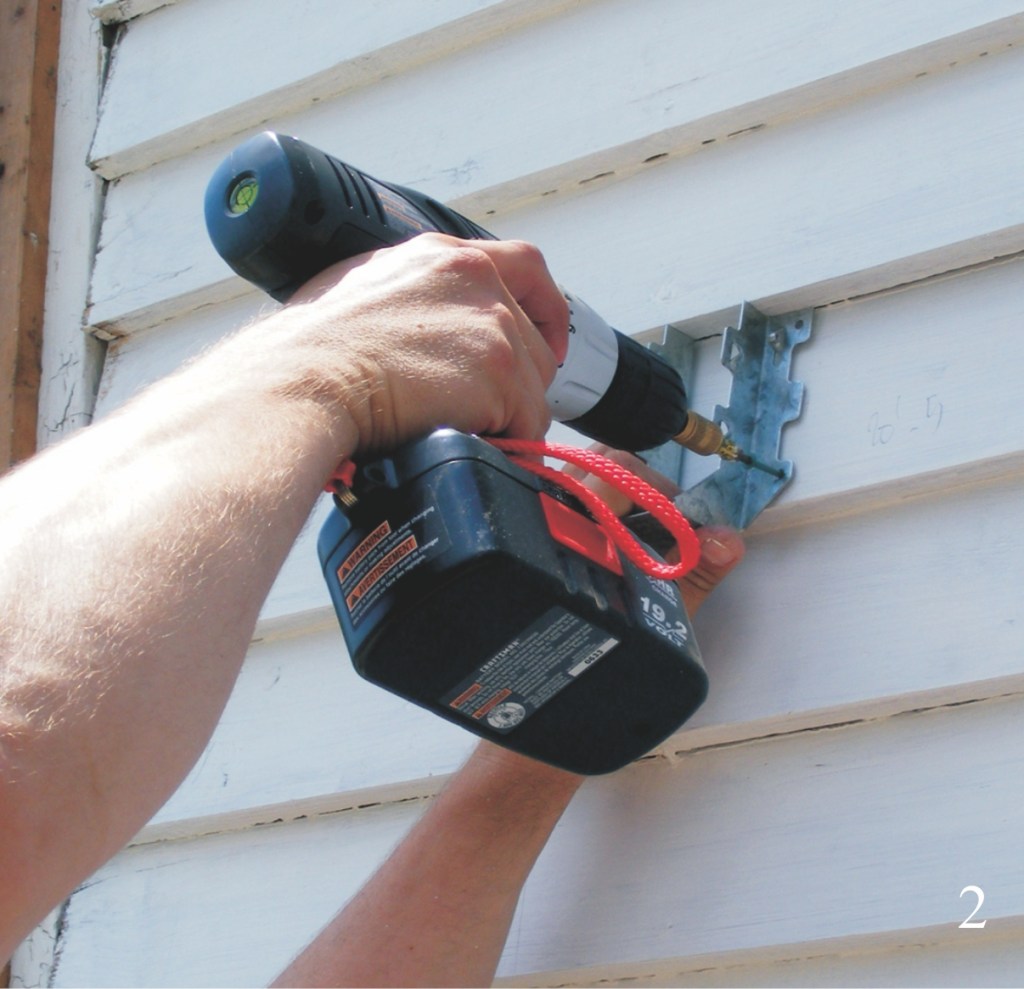
Image 2
My horrific Aussie experience was simply an issue with metal fatigue on one of the main frames and may not ever happen again! At least not to me! Now, I am not condemning the use of metal scaffolding in any way because there are just as many injuries on wood and bamboo scaffolding as there are on steel. However, the injuries are usually related to certain safety measures that were not met or the system was overloaded.
The reason I use wood is somewhat related to cost. In addition, I just feel more comfortable on a very ridged sturdy wooden platform, and as you are quite aware as a reader of Old Home Living, I like to do things old school!
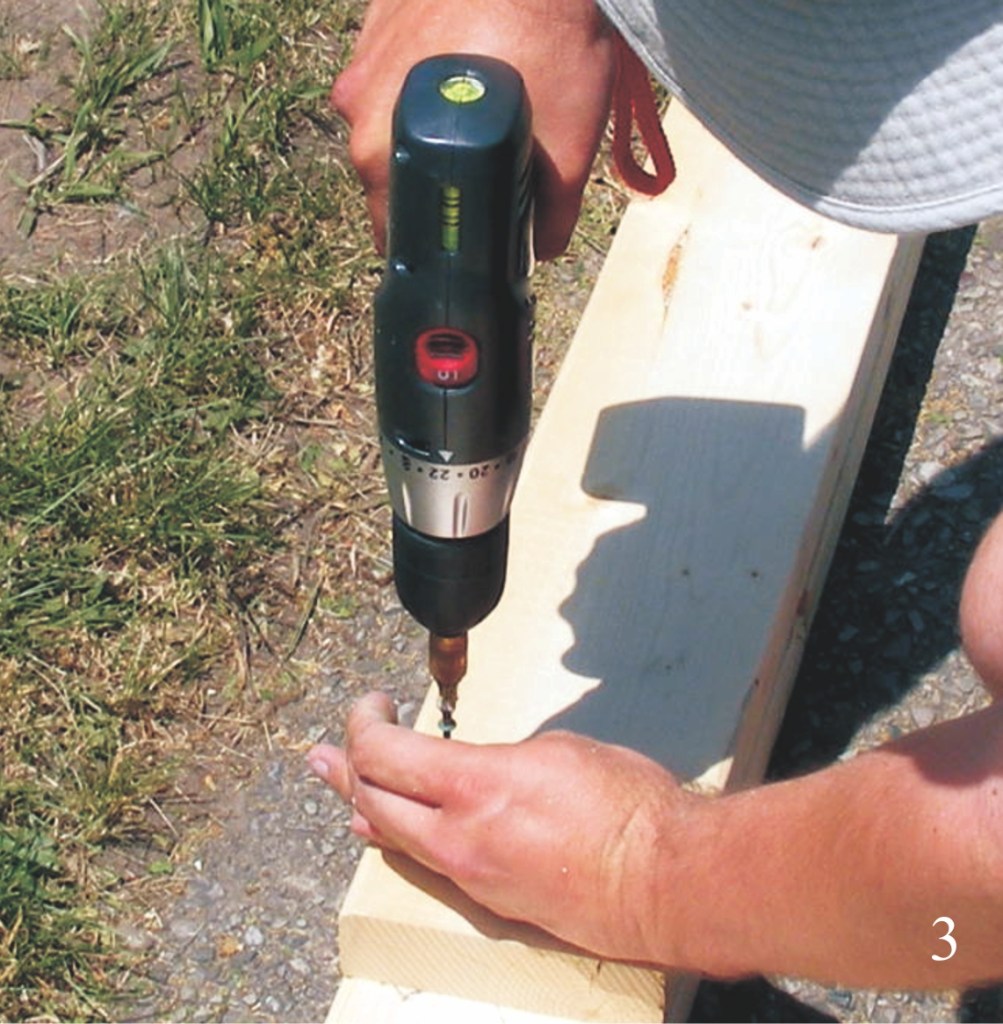
Image 3
We first called around for the cost of renting metal scaffolding that would run across the gable end of the house (24 feet) to a 15-foot level of grade. The cost was $866.40 (including tax, delivered) for two months of rental. You see, this is the point of this article: not everybody is working on their house on a full-time basis; we certainly cannot afford the time, and therefore we would need at least a two-month rental (one month on one side and another month on the opposite side).
Another option is to buy metal scaffolding. The cost, however, is astronomical. For just a single 7-foot wide section to reach up 15 feet (with casters to move the whole works), it priced out at $1,240.55. And, if the entire gable end was to be covered, it would be triple that cost. My attention turned back to wood. I was able to cover the entire side of the house for under $300.00. The wood can easily be moved to the other side of the house and timing is not an issue. Moreover, I have plans to recycle the wood once the project is complete.
The first 9 feet of the house was scraped and primed using a small folding rolling scaffold we picked up at Canadian Tire (see image 1).
After a trip to a Home Hardware lumber store (to purchase select #1 structural timber) in town, I got to work putting up the scaffolding. I first affixed approved floor joist hangers (this is what is called a single pole scaffolding system) at stud locations on the vertical wall of the house with 3” coated deck screws at equal distances less than five feet on centre (see image 2). Once the scaffolding is removed, the holes left by the screws will be filled with epoxy and painted.

Image 4
I laid out the mud sill that bears the weight of the whole scaffolding on the ground and used a piece of wood to make a splice joint between the two pieces (see image 3). I marked all the locations of the 2” x 6” upright poles on the mudsill and placed small pieces of wood to temporarily support the uprights during the installation process (see image 4).
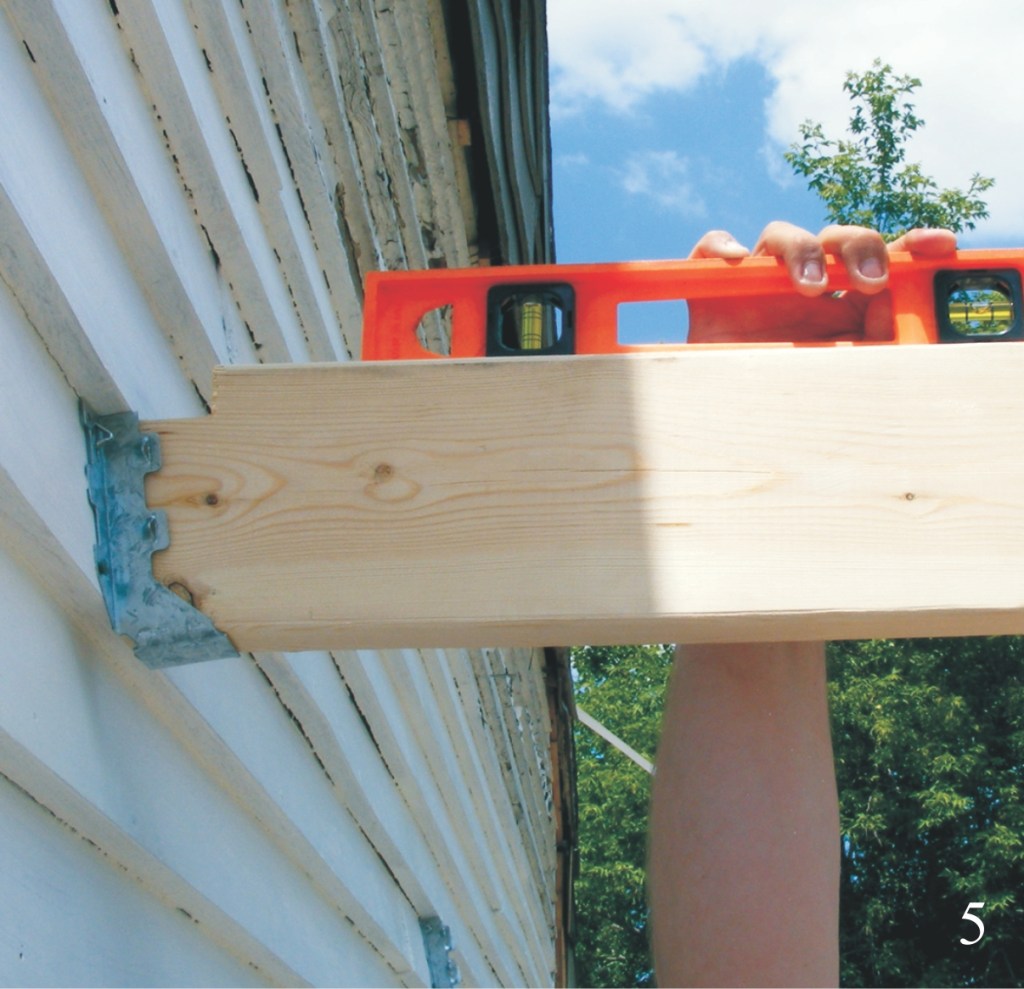
Image 5
I found the correct angle of the siding and the joist hanger and transposed the proper angle onto the 2” x 6” bearers and cut them out and notched the top to fit (see image 5). I used a single screw to allow the bearer to pivot and to hold the bearer into the joist hanger (see image 6). The upright is lifted into place with the mudsill in its proper position and, again using one screw (to allow the upright to pivot), I drove home a 3” coated deck screw into the temporary supports mentioned earlier.
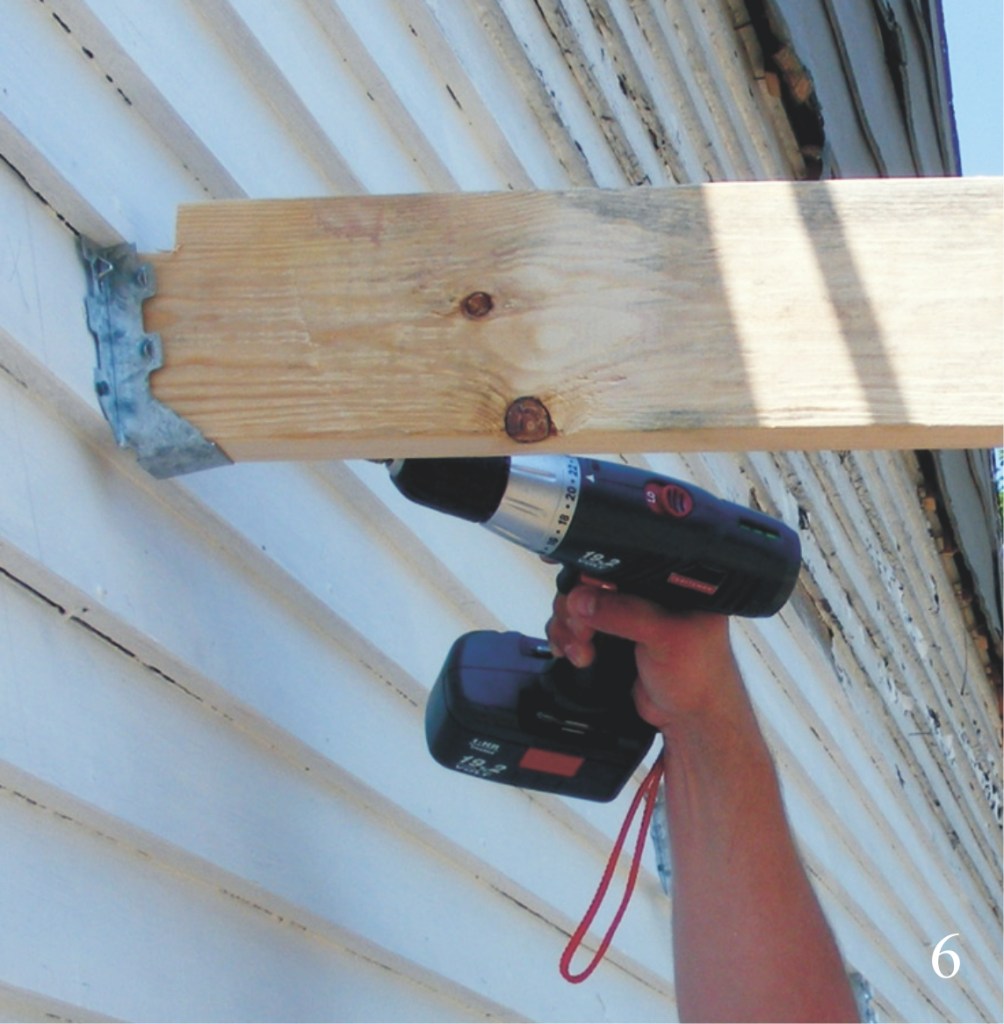
Image 6

Image 7
With the aid of a level and marking a distance of three feet (width of the platform) on the bearer, I was able to mark the plumb position of the bearer and the upright’s union (see image 7), and drove two 3” screws home and one on the opposite side centre for good measure (see image 8). The rest of the uprights followed in suit, making sure to place my weight on the mudsill when plumbing the uprights and bearers.

Image 8
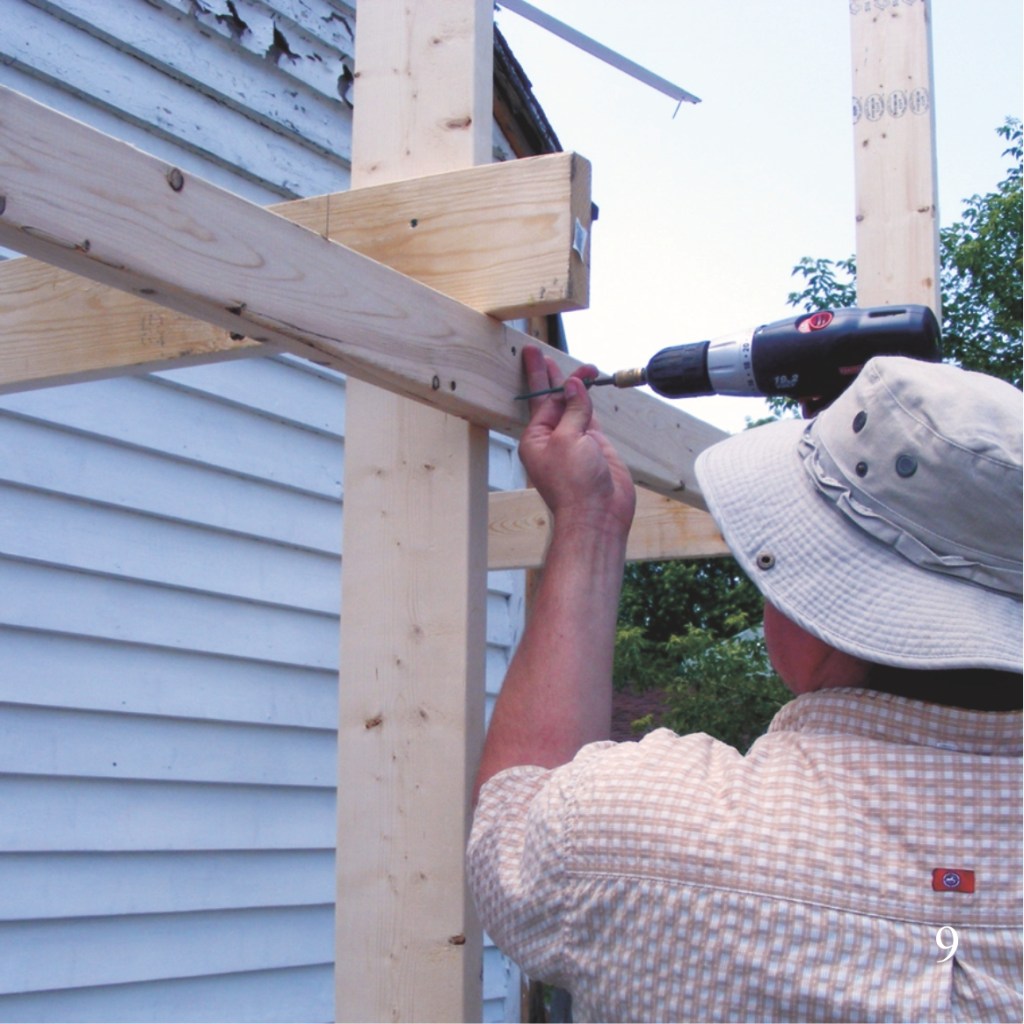
Image 9
The next step was to install 2” x 4” ledgers to aid in the support of the bearers and provide lateral support. I drove home two 3” screws at each upright (see image 9). At this point the whole system will sway back and forth until the cross bracing is installed at each bay (see image 10). Now that the scaffolding was very secure and plumb, I went around and toe-screwed all the uprights to the mudsill and drove more screws into the joist hangers (4 in total) and at the union of bearer and joist hanger.
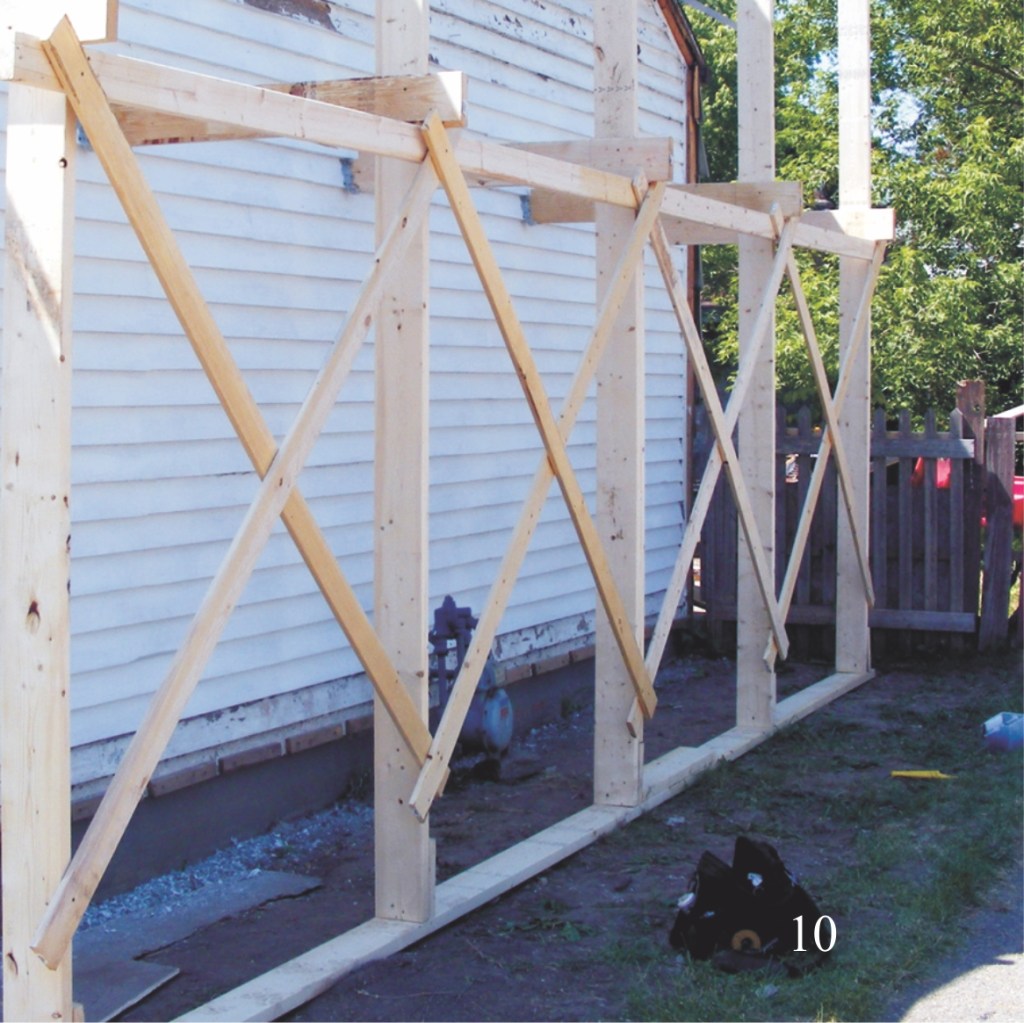
Image 10

Image 11
The decking is very important and this is where most injuries and death happen on scaffolding. The decking material must be of scaffolding grade stamped 2” x 10” or, at the very least, select structural number 1 with little or no knots and very straight grain! Each board is screwed down into the bearers with several 3” screws (see image 11). A 2” x 4” railing set at 42” off the deck was installed with 2 screws at each upright (see image 12). An intermediate rail was installed below and a toe-board (2” x 4”) was installed at ½” above the deck to stop tools or your foot from slipping off the edge (see image 13).

Image 12
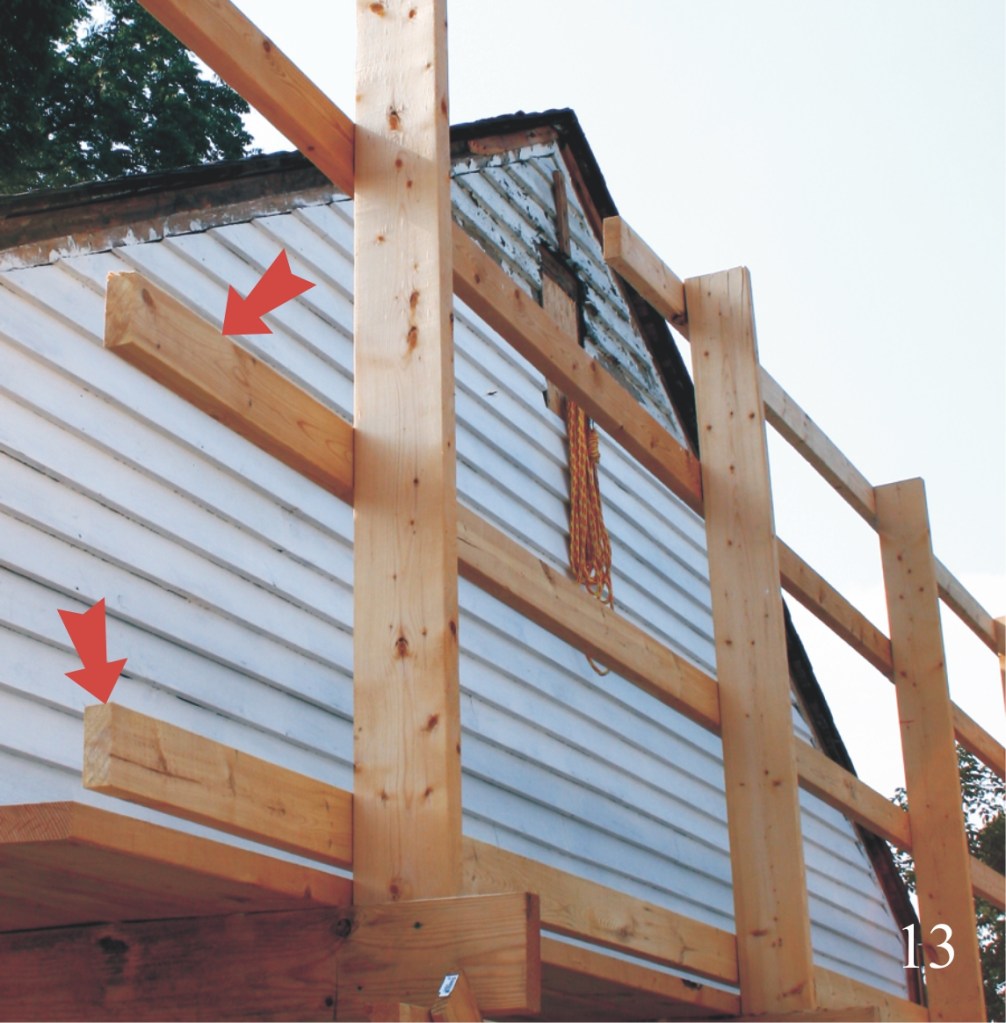
Image 13
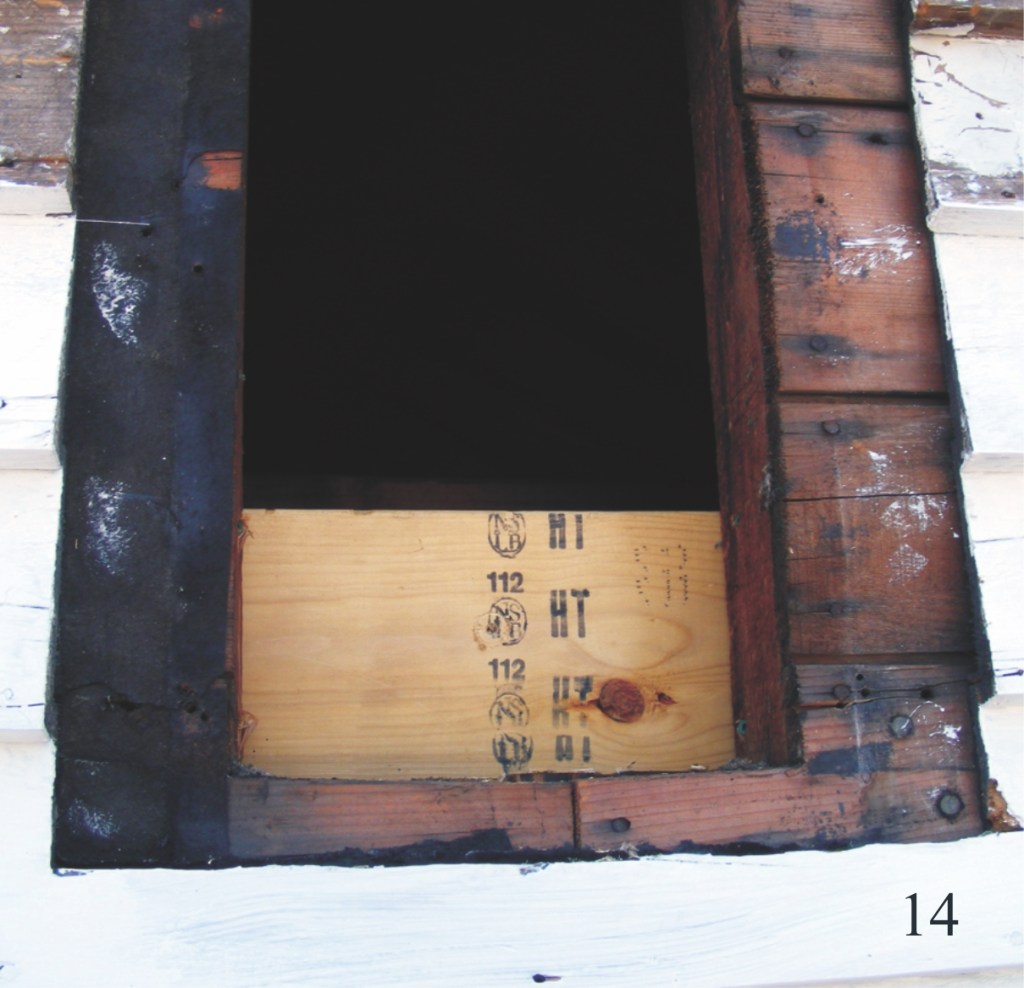
Image 14
I cannot stress the importance of a safety line and harness that is fixed to the structure and not the scaffolding. The vent window on the side gable will be replaced with a window and this gave opportune time to slip a 4-foot long 2” x 6” board into the opening and secure it from the inside (see image 14). A hole was bored in the centre of the board and a long eye-bolt (rated for 1000 lbs) with large washers and locking nuts were installed as an anchor for the safety line (see image 15). The anchor will provide a safe latching point for your harness (see image 16).

Image 15

Image 16
An aluminium ladder was placed on the end of the decking with a 2” x 6” notched to accept the top portion of the ladder effectively locking it into place (see image 17). A stout chain and lock will not allow slippage of the ladder and not allow it to sprout legs and walk away in the middle of the night (see image 18)!

Image 17

Image 18
Well, there you have it! A safe and economical platform to work from that can be dismantled by backing out screws and moving it to the opposite side of the house. This project took me five hours to complete and even I feel safe up on it (knocking knees be stilled). I can now work at my leisure this summer and not be stressed about the cost of the ticking clock of a rental. I must warn anybody erecting wooden scaffolding not to skip any safety feature noted in this article (especially safety harnesses and lines). For higher scaffolding, two storeys or more, refer to this website: www2.worksafebc.com and search for publication “WCB Standard: WPL 1-2004 Design, Construction and Use of Wood Frame Scaffolds”. And, when in doubt, consult a structural engineer!
Side bar:
Important Notice
While all precautions have been taken to ensure accuracy and safety in the execution of articles, illustrations, images and plans found in Old Home Living, we accept no responsibility for errors and omissions herein, nor liability for accidents, material losses or injuries resulting from the use of information supplied in these articles, illustrations, images and plans.
