Editorial & Photography By: Dr. Christopher Cooper
In our previous article entitled “Wallpaper Woes,” where we gave our best advice to repair plaster walls after the removal of many layers of wallpaper. In the very same hallway at Old Home Living House Two, in which we repaired the plaster, we ran into another catastrophic issue when repainting!
In many areas in the hallway, the plaster was in pristine condition underneath the wallpaper, and the need for a plaster skim coat was not required. We were in the process of readying the house for Doors Open Oxford and failed to prime the walls with an oil-based primer first. I have always used an oil-based primer on walls that have never been painted in the past; I failed to do this in this case. Why? Timing, I suppose!
I laid a tarp out on the floor and got to work applying a lovely coat of Buttermilk acrylic latex paint which, by the way, covered the new plaster in one coat, and left for the day, leaving the last section, the pristine plaster section, wet!
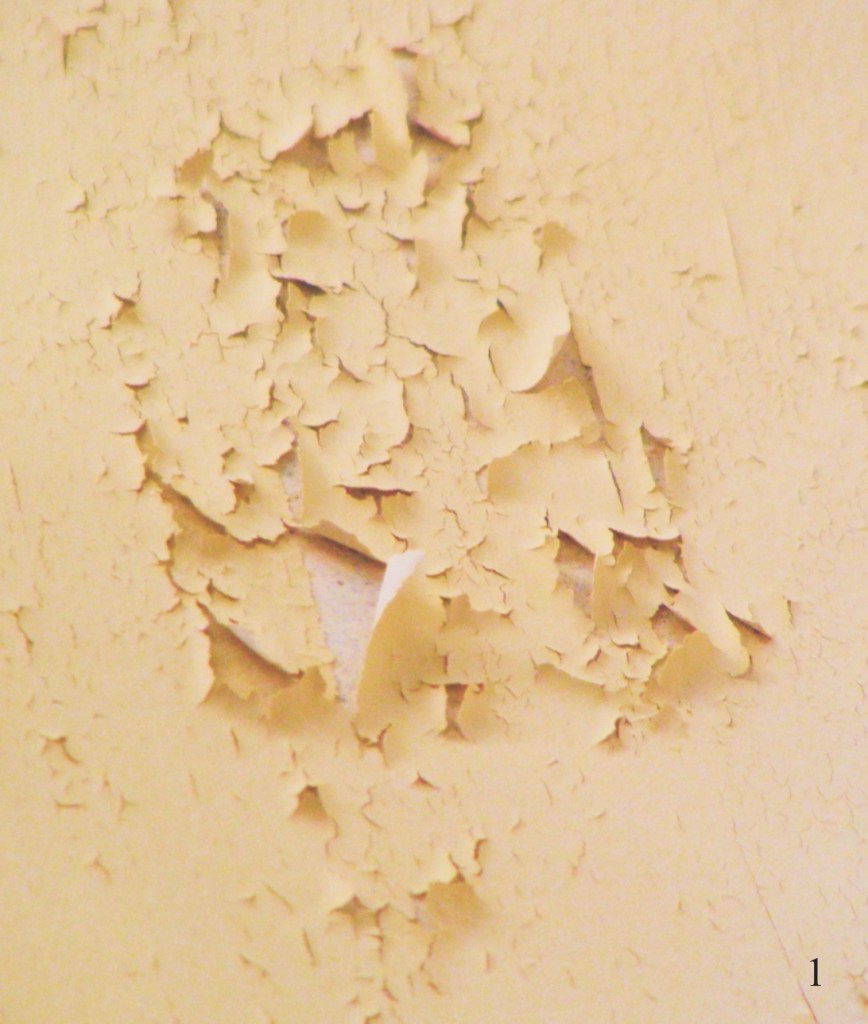
Image 1
The next day I came in and all the areas that did not receive a skim coat of plaster were cracked and peeling, not unlike the surface of the Sahara desert (see Image 1). Certainly not a failure of the paint but a failure of the operator, ME! I had always been told that you could not apply water borne paint on walls that have had home-brewed wallpaper paste applied to it. And Old Home Living House Two has had wallpaper on its walls for the past 170 years with not so much as a lick of paint in that time.
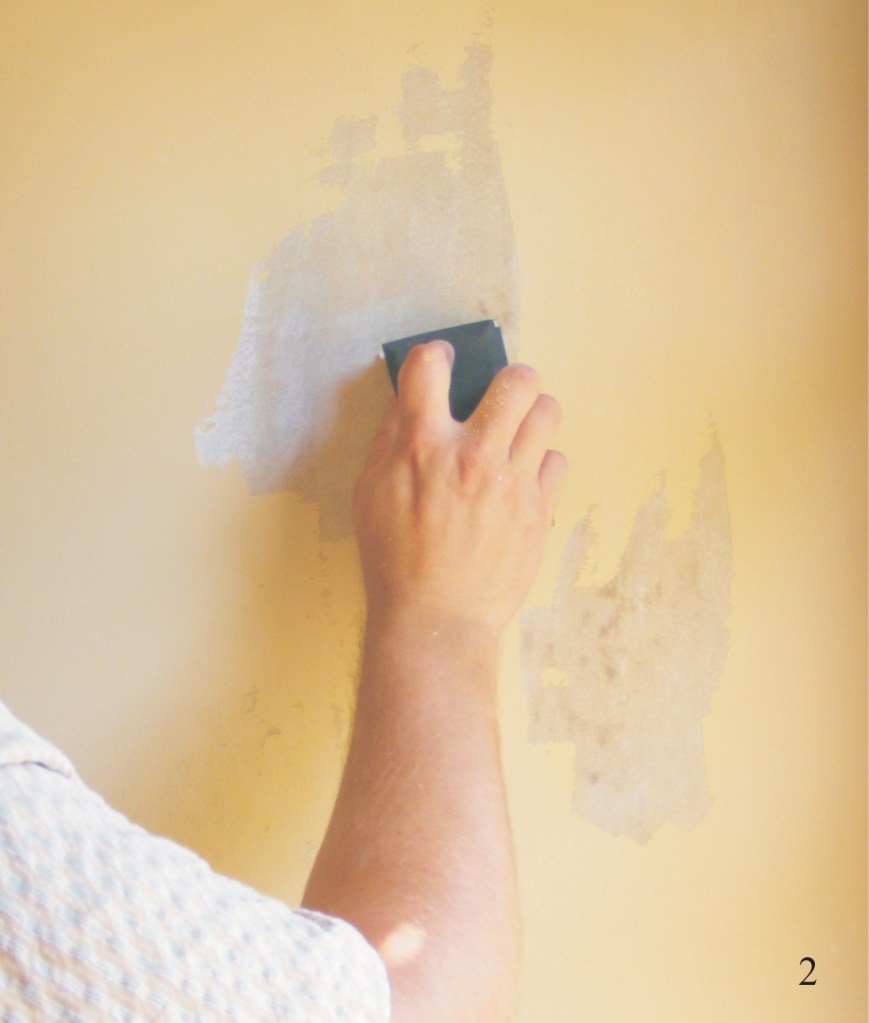
Image 2
The recipe for old time wallpaper paste, and an environmentally green one at that, includes alum. Alum does not like latex paint and will crack the paint due mostly in part to the alum’s effect on the surface tension of the latex paint. The resolution for our predicament was to use a carbide scraper to remove the peeling paint, followed by feathering the edges of the affected areas with sandpaper (see Image 2), then following-up with a coat of shellac (see Image 3). After the shellac dried, I lightly sanded the area and reapplied my latex paint with success (see Image 4).
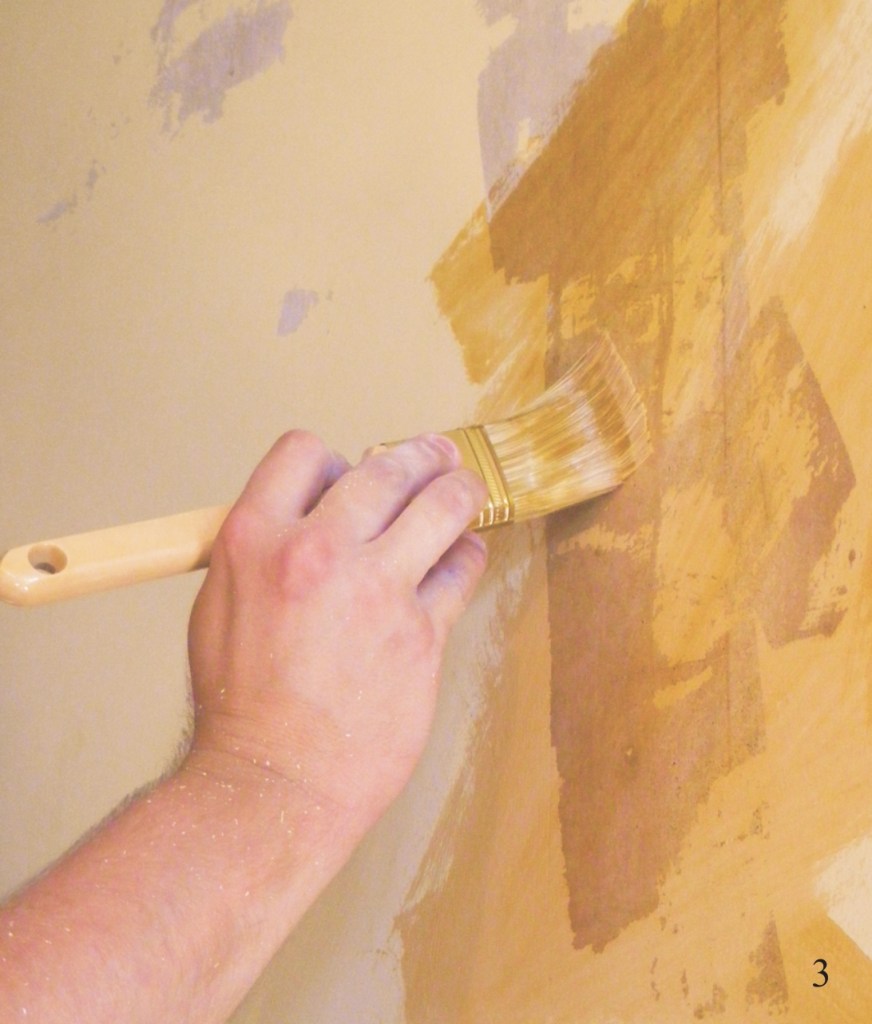
Image 3
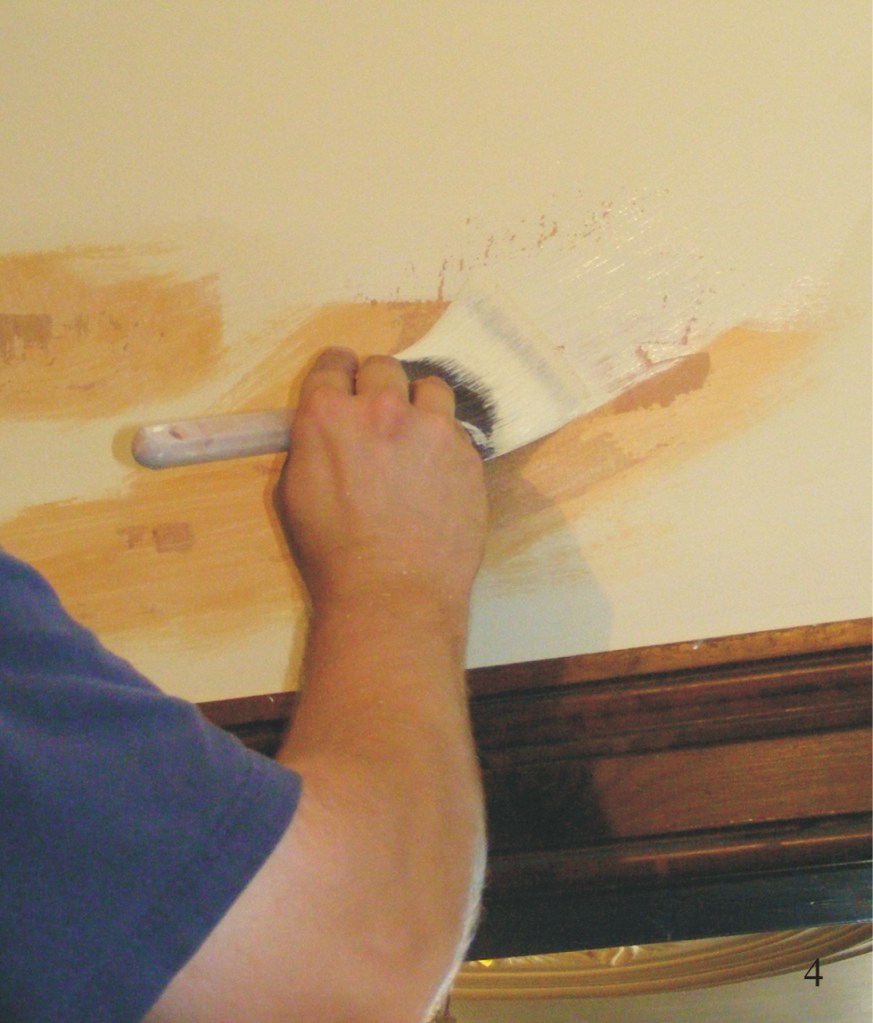
Image 4
The use of an oil-based primer before the application of a latex paint would have stopped the alum from bleeding through, and will always provide a nice clean canvas to work with to see if any areas need attention with a plaster touch-up. The shellac will do the same to seal against the alum, however, is a bit difficult to use because it dries so quickly and requires sanding before painting.
Side bar:
Green Paste
For those of you who would like to use unglued wallpaper again, after you repair the walls, here is a recipe. This recipe dates back to the early nineteenth century and is free of pesticides and can be considered a green alternative to commercially available pastes.
Simple Solution:
1 cup of flour (wheat, corn or rice)
3 teaspoons alum (found in the spice section of your local grocer)
Water
10 drops oil of cloves (natural preservative found in health food stores)
Directions:
Combine the flour and alum in a double boiler. Add enough water to make a consistency of heavy cream; stir until blended. Heat, stirring constantly, until the mixture has thickened to a gravy texture. Let cool. Stir in the clove oil. Pour into a glass jar with a screw top. Apply as needed with a glue brush.
Makes 1 cup (for larger wallpapering jobs, you would make a larger batch by simply increasing the quantities of each ingredient).
Shelf Life: Two weeks when refrigerated.
